
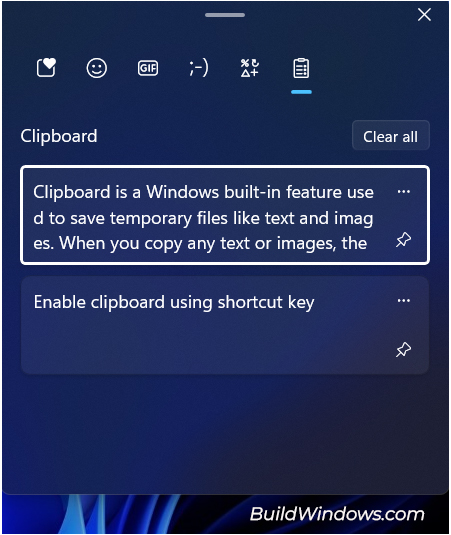
Clipboard is a Windows built-in feature used to save temporary files like text and images. When you copy any text or images, the clipboard saves the copied data temporarily on your computer’s memory and these data gets cleared after each system restart.
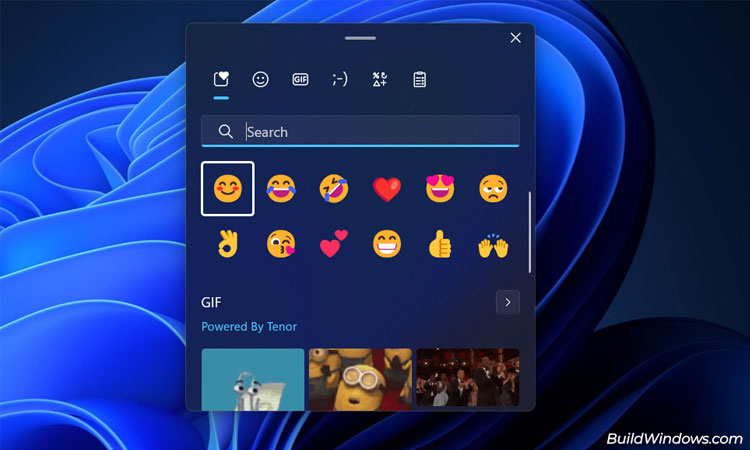
The latest version of Windows 11 has improved the clipboard window by adding new features like emojis, kaomoji, GIFs, and symbols. You can easily and quickly insert any of these Clipboard attributes into your documents.
It is very easy to open your clipboard on Windows 11, simply press Windows + V and you can access your entire clipboard history along with other new features in it. But first, you need to enable the Clipboard history as it is always disabled on every Windows computer by default.
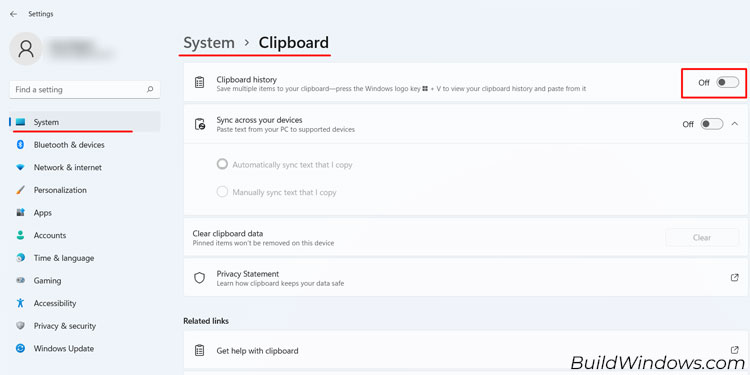
Enable Clipboard History
Enabling the Clipboard history is relatively easy. Follow these steps,
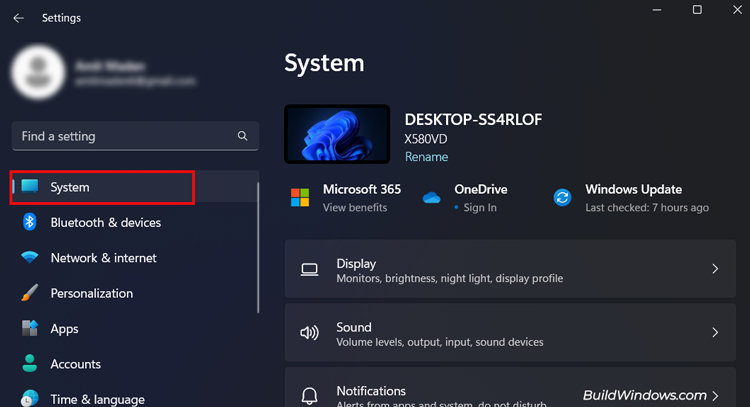
- Open Settings by pressing the Windows + I keyboard shortcut keys.
- Click the System options at the top left.

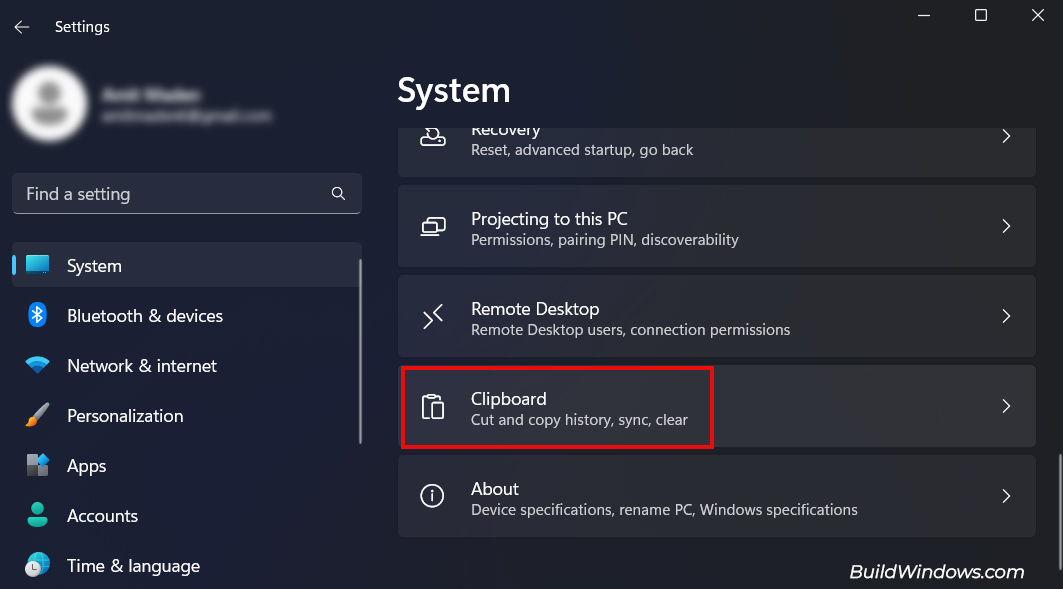
- Scroll down and select the Clipboard at the bottom right option.

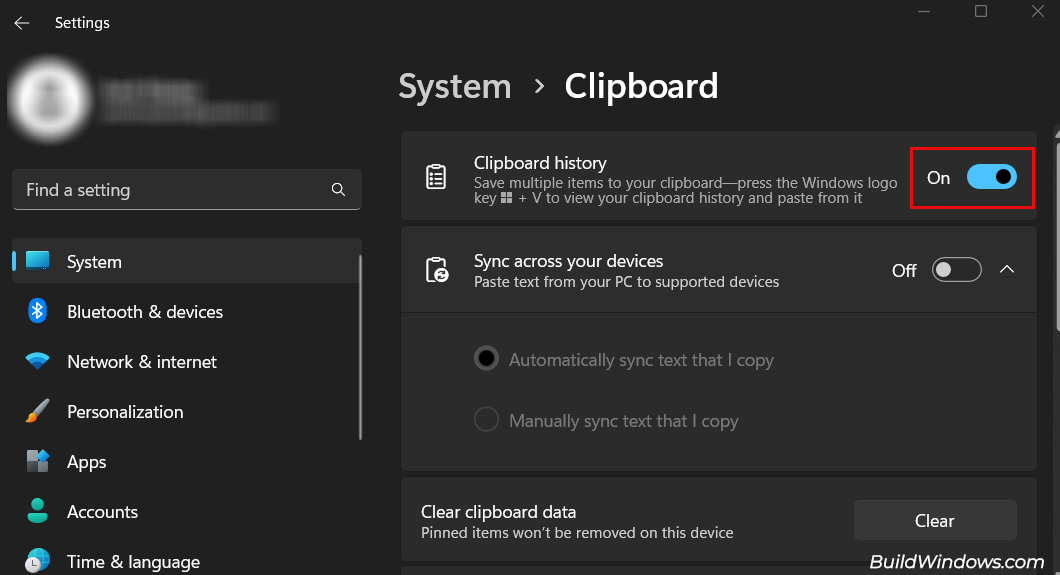
- Toggle on the Clipboard History option.

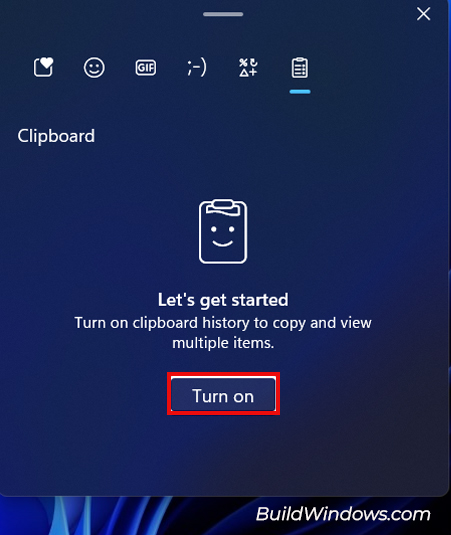
And Voila ! You’ve just turned on your clipboard history. There’s another alternative way to enable your Clipboard history. All you need to do is use the shortcut key Windows + V together and click turn on.
Open Clipboard
Similar to enabling the shortcut history, you can use the same Window + V shortcut key to Open your Clipboard window. Here, you will see all the text or images that you have copied, listed in a Clipboard history tab.
Additionally, it also has features like emojis and GIFs, making it even more fun and interesting to use.
Managing Your Clipboard History
Your Clipboard history will only hold up to 25 items. If you copy more than 25 items in your Clipboard, then your earlier data will be removed to make space for the new additions. So, managing your Clipboard history properly will help you make space for your important items.
Pin Items
Sometimes you may have to use the same item again and again in an extended period of time and copying it every time might be a hassle. Here, you can directly pin those items in your Clipboard history and later use them whenever you need.
Data that you’ve pinned won’t be replaced or removed in any case, not even if you restart your device.
To pin your items on your Clipboard, follow these steps.
- Press Windows + V.
- Click on the pushpin icon on the right-hand side of the item.
Note: You can only pin up to 25 items on your Clipboard. After that you won’t see the pushpin icon on other copied elements but the clipboard history can still hold onto another 25 items.
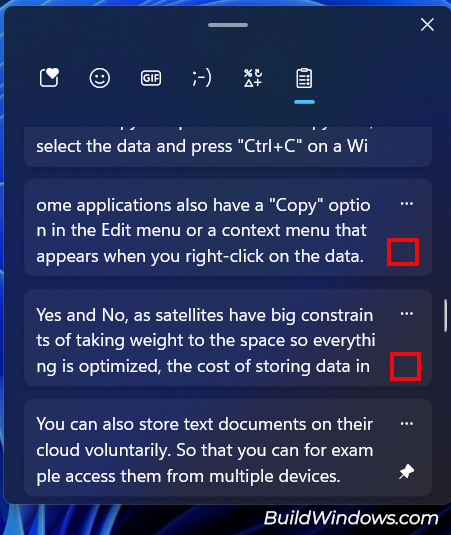
You can also delete your pinned data on your Clipboard history. To do so,
- Go to the Clipboard history by using the Windows + V shortcut key.
- Click on the See More icon on the top right-hand side of the text box.

- Click the delete option.
This method will help you remove the pinned items individually. But, you can also remove the entire list all at once. Simply go to Settings > System > Clipboard and turn off the Clipboard History. Just make sure you turn it back on to start saving clipboard history again.
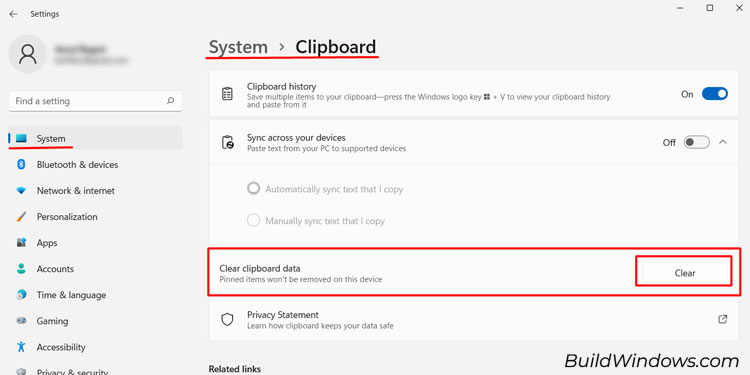
Clear Clipboard History
To clear your entire clipboard history, restart your pc once. But in cases where restarting is not possible, you can do it from settings. Both of these methods won’t clear the pinned data though.
- Open Settings
- Go to System > Clipboard
- Click on Clear Clipboard data at Clipboard Settings.

Additionally, you can also delete the clipboard data all at once from the Clipboard window itself. Click on clear all button on the top right side of the Clipboard History tab.
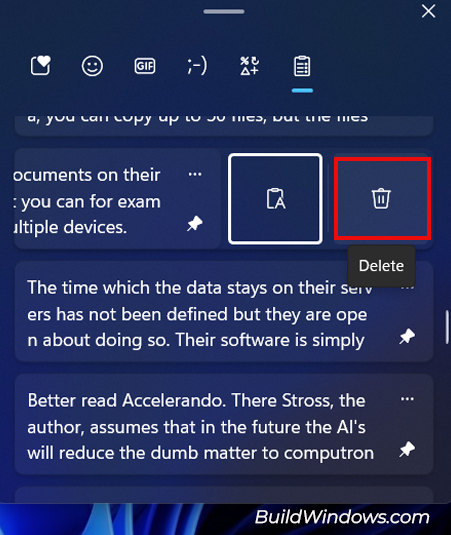
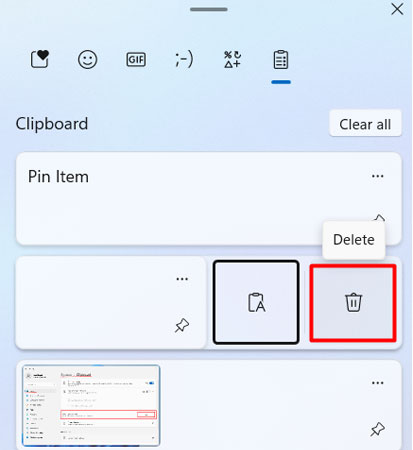
Now to delete the entries one by one,
- Simply open the clipboard history tab by clicking Windows + V.
- Click on the 3 Dots on the Right hand side of the item that you want to delete.
- Click on Delete.

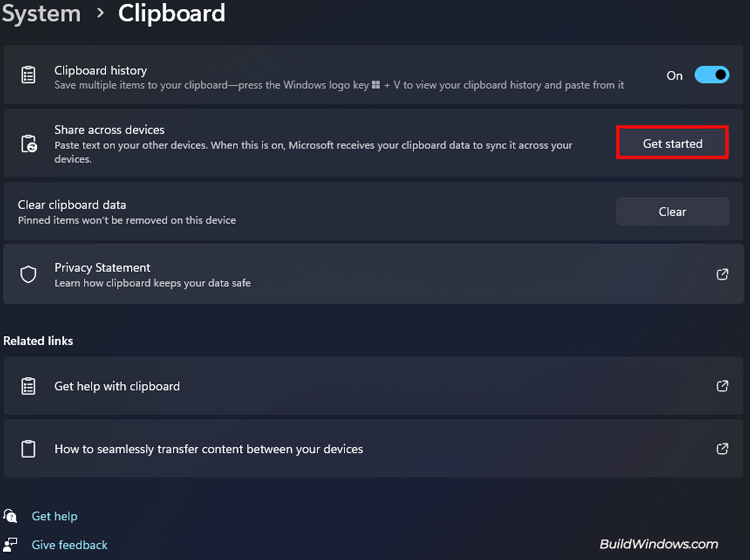
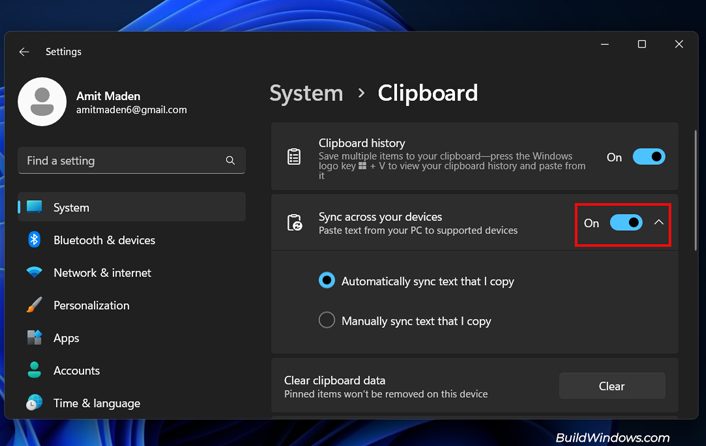
How to Sync Clipboard History on Other Devices?
You can also sync your clipboard history by pasting text from your Windows PC to any supported device. However, remember that the sync feature is linked to your Microsoft account, so you must use the same login credentials across all devices.
- Open Settings using the same shortcut key above.
- Go to the System option and click the Clipboard option again.
- Click Get Started on Share across your devices option.

- Log in to your Microsoft Account to verify your identity.

- Enter the code sent to your specified email or number and verify.
- Click on the Sync across your devices option and toggle on.

- To sync your clipboard history, you can either choose automatically or manually sync text that I copy.

How to Turn Off Clipboard on Windows 11?
To turn off clipboard on Windows 11, go to Settings > System > Clipboard. Here toggle off the Clipboard History option. This will turn off your clipboard completely and it will no more save any data on the clipboard until you turn it back on.