Picture this— you just got a rare item in a video game, and you want to show it off to all of your friends. The simplest way to capture this moment on your Windows 11 PC is by taking a screenshot.
You can easily do so by using keyboard shortcuts or with built-in apps like Xbox game bar and Snipping tool. In case, you want advanced features like scrolling screenshots, you can also use third-party apps.
I tend to take a lot of screenshots throughout the day, so I usually prefer keyboard shortcuts. They are the fastest way to screenshot on Windows 11. But for moments when i have to customize my screenshot, I often use Windows 11’s default screen capture app, Snipping tool.
Using Keyboard Shortcuts
You can pretty easily take a screenshot on your Windows 11 computer by using the keyboard shortcuts. These shortcuts usually differ depending on what type of screenshot they take and where they save them.
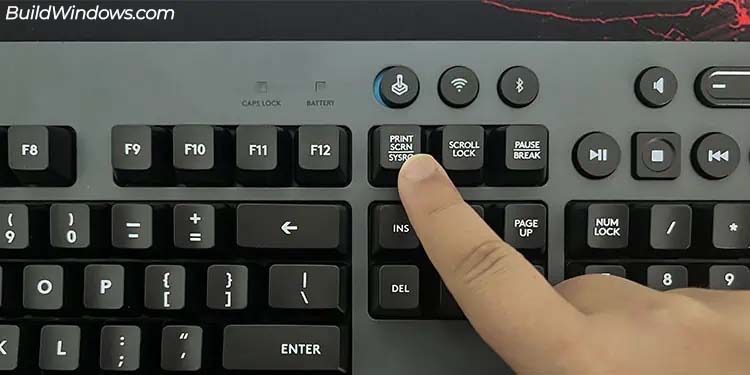
- PrntSc: Pressing the PrtSc key will take a screenshot of your whole screen and save it in the clipboard.

- Windows + PtSc: This shortcut key will screenshot your whole screen and save it locally in the
C:\Users\Username\Pictures\Screenshotslocation. Here username is your windows user account name. - Alt + PrtSc: This will take a screenshot of your active window and save it in the clipboard.
- Windows + Shift + S: This will open the Snipping tool and help you take screenshots using various modes like Rectangular, Freeform, Windows and Fullscreen. The screenshot gets stored automatically in the clipboard.
If your screenshot is saved in the clipboard, you can press Ctrl + V to paste it into any compatible application or website. To save it locally on your computer, use the Windows preinstalled MS Paint application. Simply open the Paint app, press Ctrl + V to paste it there, and press Ctrl + S to save it.
Using Xbox Gamebar
The Xbox Gamebar is one of the pre-installed application on Windows 11 with which you can take a screenshot. It is a feature primarily intended for gamers, as the Xbox game bar makes it very easy to natively screenshot video games. Nonetheless, you can take normal screenshots with it as well. Here’s how you can do so:
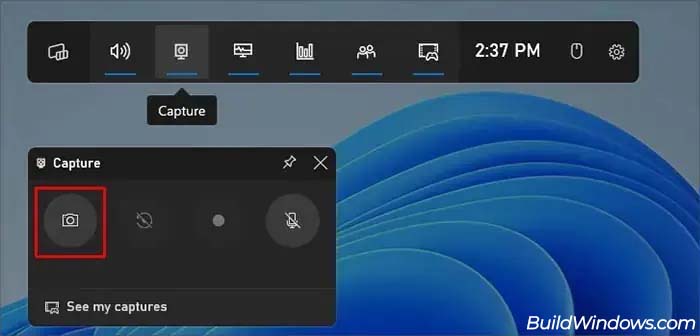
- Open the Xbox Game Bar by pressing the Windows + G shortcut.
- In the capture window, click on the camera icon to take a screenshot. (If the capture window isn’t present, click on the webcam icon in the menu bar.

- As an alternative, pressing the Windows + Alt + Prtscn hotkey will take a screenshot directly from the Xbox Gamebar.
Xbox Gamebar can only capture the active window and your screenshots are saved in the C:\Users\Username\Videos\Captures location. Here, Username is the actual username of the user account on the Windows system. This is typically the name you use to log into your computer. For Example, if your username is “Bishwo”, the file path would become
C:\Users\Bishwo\Videos\Captures
Using Snipping Tool
Another way to take a screenshot on your Windows 11 computer is by using the built-in Snipping Tool application. The Snipping Tool has four different modes with which you can take a screenshot.
- Rectangle mode: Capture specific rectangular area of your screen
- Window mode: Screenshot only the selected window or pop-up.
- Free-form mode: Capture irregular shapes or portions of your screen that don’t have a distinct rectangular or square form.
- Full-screen mode: Screenshot your entire screen.
Follow the steps to take a screenshot using the Snipping tool.
- Click on the search bar, type
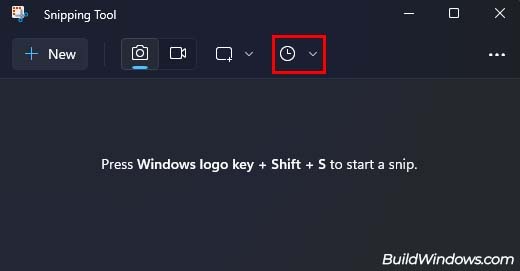
snipping tool, and click on the result. (If you use Windows 10, search forSnip & Sketchinstead.) - Make sure the camera icon beside New is selected.

- If you want to set a timer for the screenshot, do so from the clock icon.

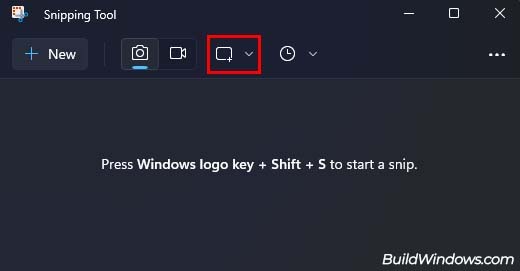
- Click on the middle icon to choose a mode for your screenshot.

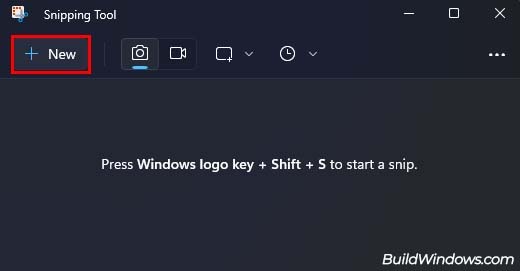
- Select New.

- Take a screenshot according to your desired mode.
- After doing so, the screenshot should appear in the Snipping Tool app. Press Ctrl + S to save it.
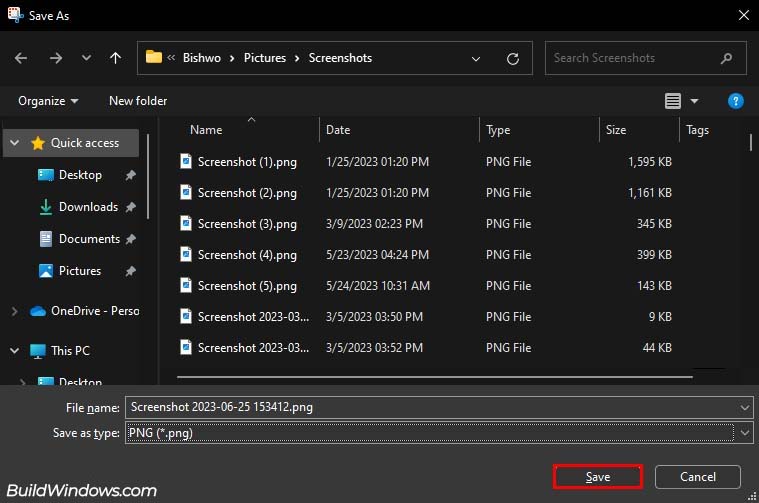
- Enter a name, choose the location and filetype for your screenshot, and click on Save.

You can also take a screenshot from the Snipping Tool using the keyboard shortcut, Windows + Shift + S.
Using Third-Party Applications
Finally, if you don’t want to take screenshots on your Windows 11 using the native methods, you can use third-party applications to do so. In few cases, using third-party applications can be a way better option.
Third-party apps usually have rich features like more customizable screenshots, highlighting areas, annotations, and much more. You can even add texts, draw various shapes and even blur sensitive information. Some great screenshot applications that you can use are Greenshot, ShareX, and Lightshot.
