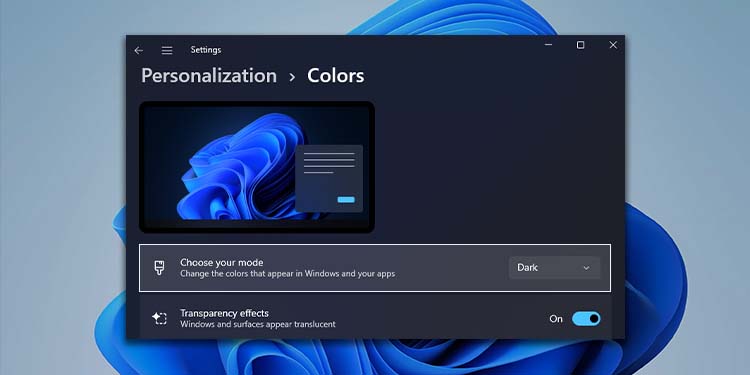
The Windows 11 operating system uses light mode by default. However, many users, including me, prefer dark mode because it is much easier on the eyes. For laptop users, dark mode also consumes much less battery than the light mode.
So, if you’re still sticking with the default light mode, then this might be your cue to make the switch. You can easily enable dark mode from settings or by changing some registry values. You can also choose whether you want dark mode for your app windows or taskbar only.
Enable Dark Mode From Settings
The dark mode features a darker tone of Windows interface with texts predominantly in white. For light mode, it is the exact opposite. This also applies to the Settings window from where we will be enabling the dark mode. To do so,
- Press Windows + I to open Settings.
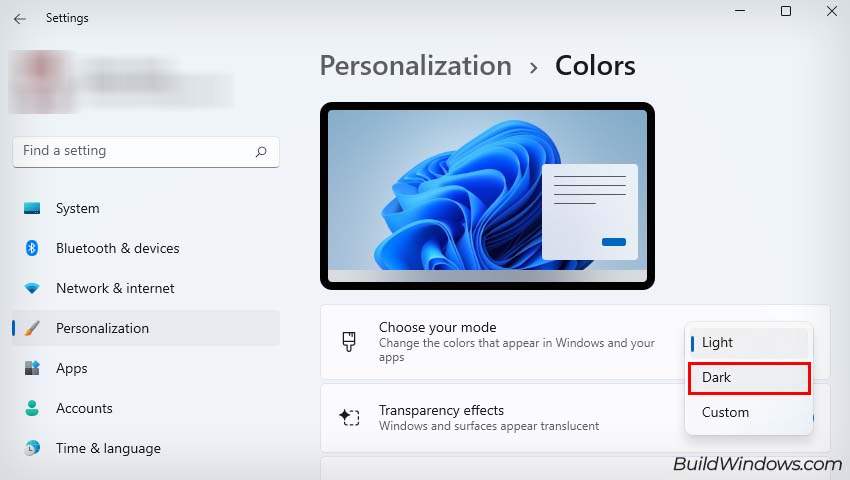
- Navigate to Personalization > Colors.
- Besides Choose your mode, select Dark from the drop-down menu. (You should see the changes immediately.)

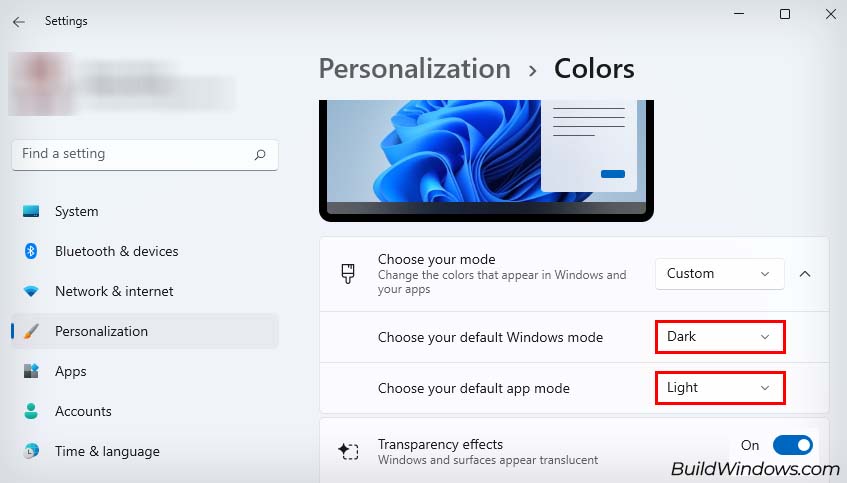
- You can also choose Custom from the same drop-down menu if you want different modes for your taskbar and app windows.
- The Choose your default Windows Mode option can be set to Light or Dark which will affect the taskbar.
- The Choose your default app mode option will change your application windows according to your set configuration.

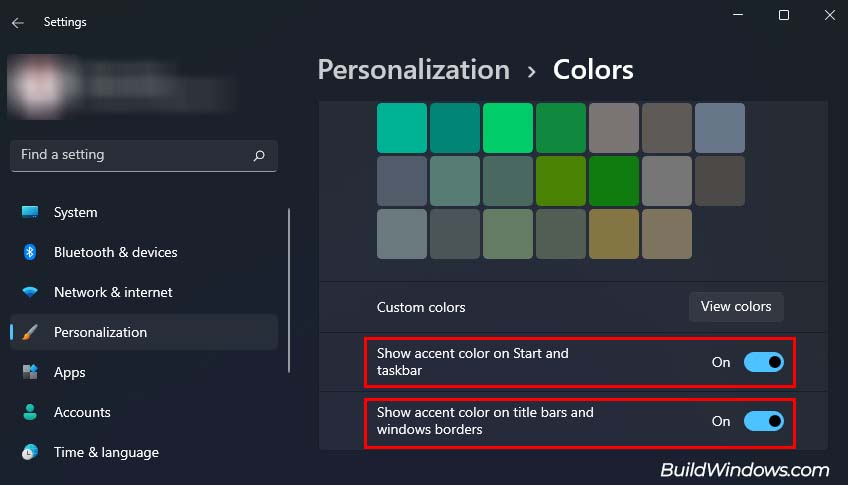
If you want to, you can also change the accent colors on your start, taskbar, title bars, and Windows borders. I like to set my accent colors to darker tones as they complement the dark mode. Anyway, let’s see how you can change accent colors,
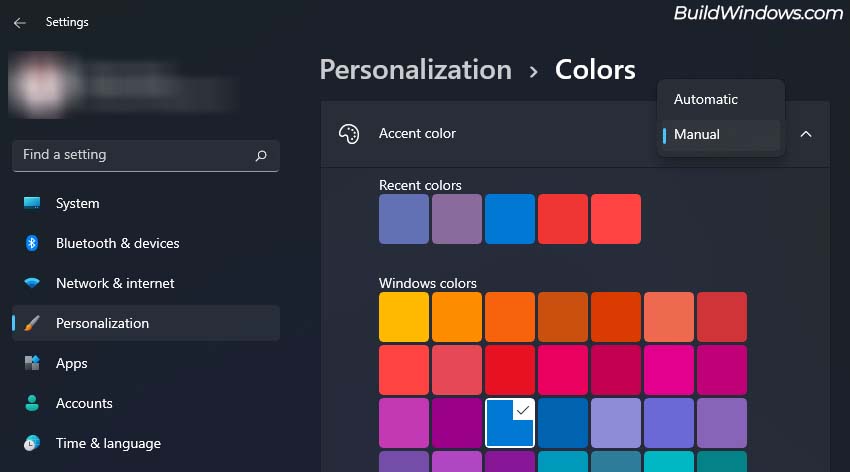
- In the same Colors Settings panel, scroll down to Accent color.
- Next to Accent color, choose either Automatic or Manual from the drop-down menu. (Automatic will apply an accent color based on the colors of your desktop background.)

- If you choose Manual, you can select any color from the color palette.
- At the bottom, you will see two options: Show accent color on Start and taskbar and Show accent color on title bars and windows borders.

- You can enable them to apply your set accent colors on the mentioned areas. (Disabling both of them will disable accent colors.)
Enable Dark Mode From Registry Editor
If you can’t switch to dark mode from Windows settings, you can directly change the dark mode settings value from Registry. This can happen due to some bugs and glitches or if your Windows 11 isn’t activated. Anyway, here’s how you can switch to dark mode from the Registry.
- Press Windows + R to open the Run dialog box.
- Type
regeditand press Enter to open Registry Editor.
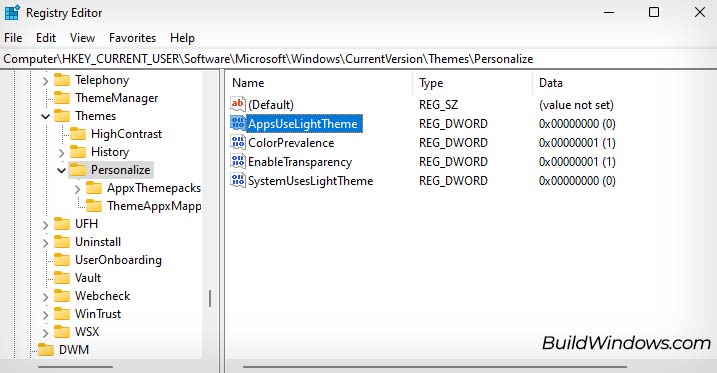
- Navigate to
Computer\HKEY_CURRENT_USER\Software\Microsoft\Windows\CurrentVersion\Themes\Personalize - In the right panel, double-click on the AppsUseLightTheme entry. (If this entry isn’t present, right-click an empty area, select New > DWORD-Value (32-Bit), and name it
AppsUseLightTheme.)
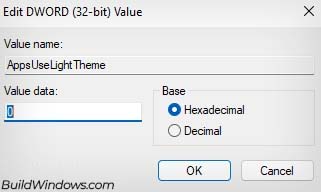
- Change the value from
1to0and click OK. (This will change all of your application windows to dark mode.)
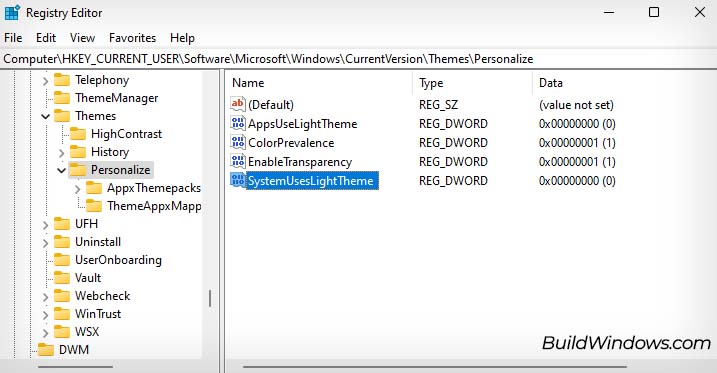
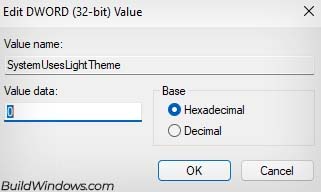
- In the same panel, double-click on the SystemUsesLightTheme entry. (If this entry isn’t present, create it using the same method as above.)

- Change its value from
1to0and click OK. (This will change your start and taskbar to dark mode.)
- Exit Registry Editor.
- If you don’t immediately see the changes, restart your computer to apply them.
How to Set Contrast Themes on Windows 11?
If you want to go a step beyond dark mode, you can try setting a contrast theme on your Windows computer. The contrast themes are an accessibility setting in Windows that uses distinct colors to make texts and apps easier to see.
Windows has three preset contrast themes that make your user interface (UI) almost completely dark; Aquatic, Dusk, and Night sky. Applying any one of these themes will change your UI to a darker tone even on areas like web pages and third-party app windows. So, let’s see how you can set one:
Note: As Contrast themes are more of an accessibility feature than an aesthetic one, your Windows UI and color might look a bit funky.
- Launch Settings using Windows + I shortcut key.
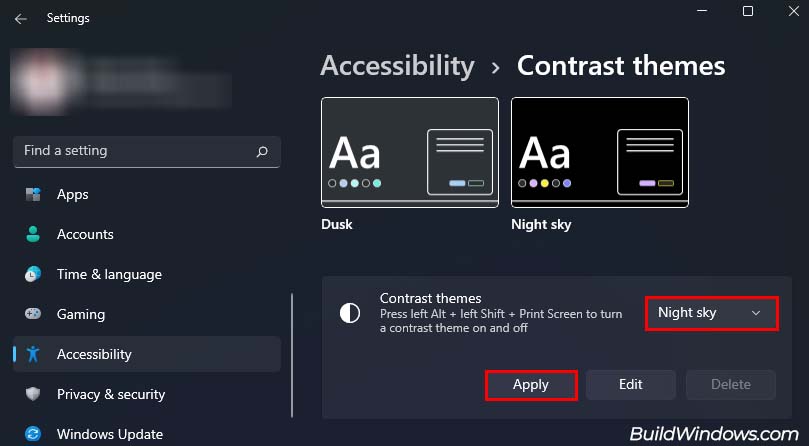
- Navigate to Accessibility > Contrast themes.
- Besides Contrast themes, click on the drop-down menu and select any one of the default contrast themes.

- Click on Apply to set the contrast theme.
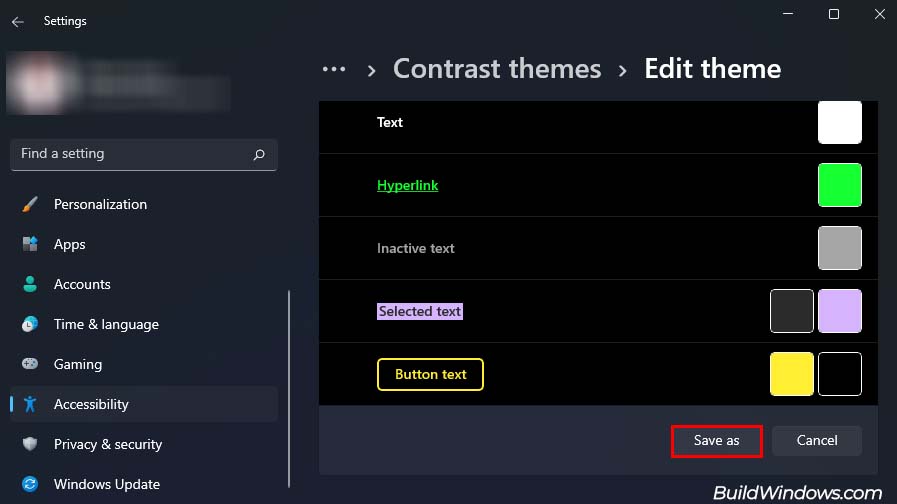
- If you want to create your custom contrast theme, click on Edit instead.
- Choose the colors for your Background, Text, Hyperlink, Inactive text, Selected text, and Button text.

- Click on Save as and name your custom theme.
- Hit Save and apply.
Additionally, If you want to remove your applied contrast theme, simply select None from the drop-down menu beside Contrast theme and click on Apply.
