Need Help Adjusting Your Mouse DPI?
If you’re anything like me, small tech tweaks can make a big difference in how you use your computer.
I’ve worked with others on adjusting mouse settings, and I’d be happy to help you too. I’ve found that tweaking the DPI (Dots Per Inch) can make a world of difference in both productivity and gaming.
Whether you’re trying to increase precision for work or speed things up for casual use, understanding and changing your mouse DPI is an important skill. I’ll show you just how easy it is to change it in Windows 11.
Quick Facts
- Time Required: 3-5 minutes
- Difficulty Level: Beginner
- Windows Versions: Windows 11
- Requirements: Access to Settings or third-party mouse software
Understanding Mouse DPI in Windows 11
Through years of working with different mouse sensitivities and trying out a variety of mice, I’ve gathered some insights that I think could be helpful for you. I’ve learned that the main cause of discomfort with mouse sensitivity is often due to an incorrect DPI setting.
DPI refers to how sensitive your mouse is to movement. A higher DPI means your mouse pointer will move further across the screen with less physical movement of the mouse.
This can be really handy if you have a large monitor or if you simply prefer a fast response. On the other hand, a lower DPI gives you more control if you need precision, like for photo editing.
Gamers generally prefer higher mouse DPI for quick and precise movements, which can provide an advantage in fast-paced games.
Whereas some gamers often use low DPI settings to get better accuracy and control, especially in first person shooter (FPS) games where accurate aiming is important.

Quick Tip: From experience, I recommend adjusting the DPI in small increments until you find the setting that feels right for your workflow.
Prerequisites
Before we begin:
- Windows Version: Make sure you are using Windows 11.
- Required Access: Standard user access is enough for built in settings. Third party software may require administrator privileges.
- Backup Recommended: No backup is needed.
Changing Mouse DPI In Windows 11
Method 1: Using Windows Settings
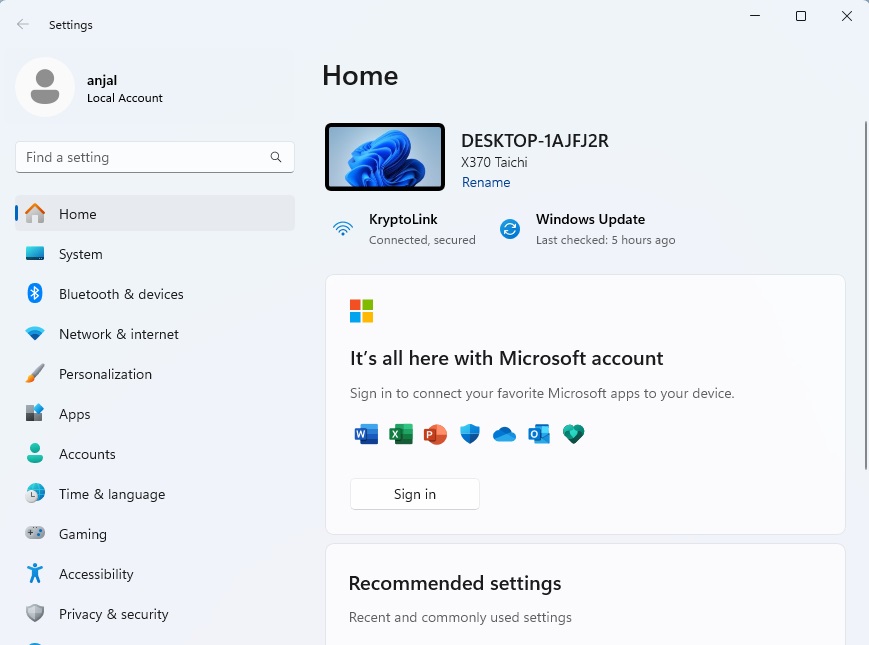
- Open the Start Menu. Click the Start menu and type ‘Settings’ in the search bar. Hit enter to open settings.

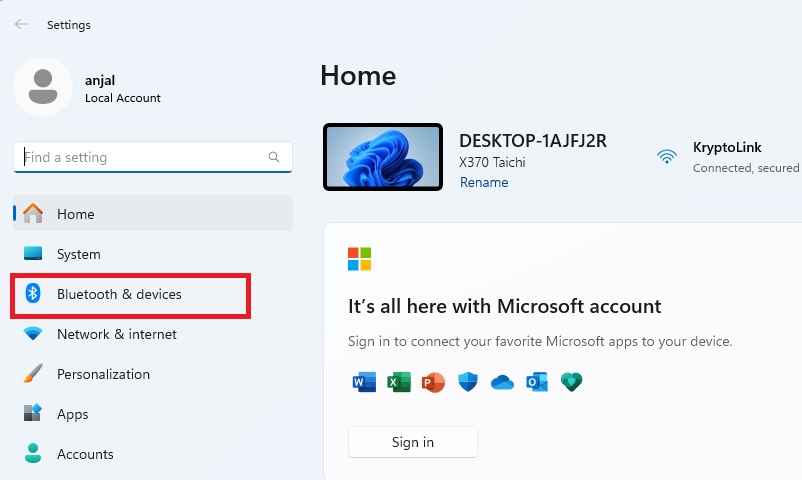
- Navigate to Bluetooth & Devices. Look on the left hand side for “Bluetooth & devices.” Click on it.

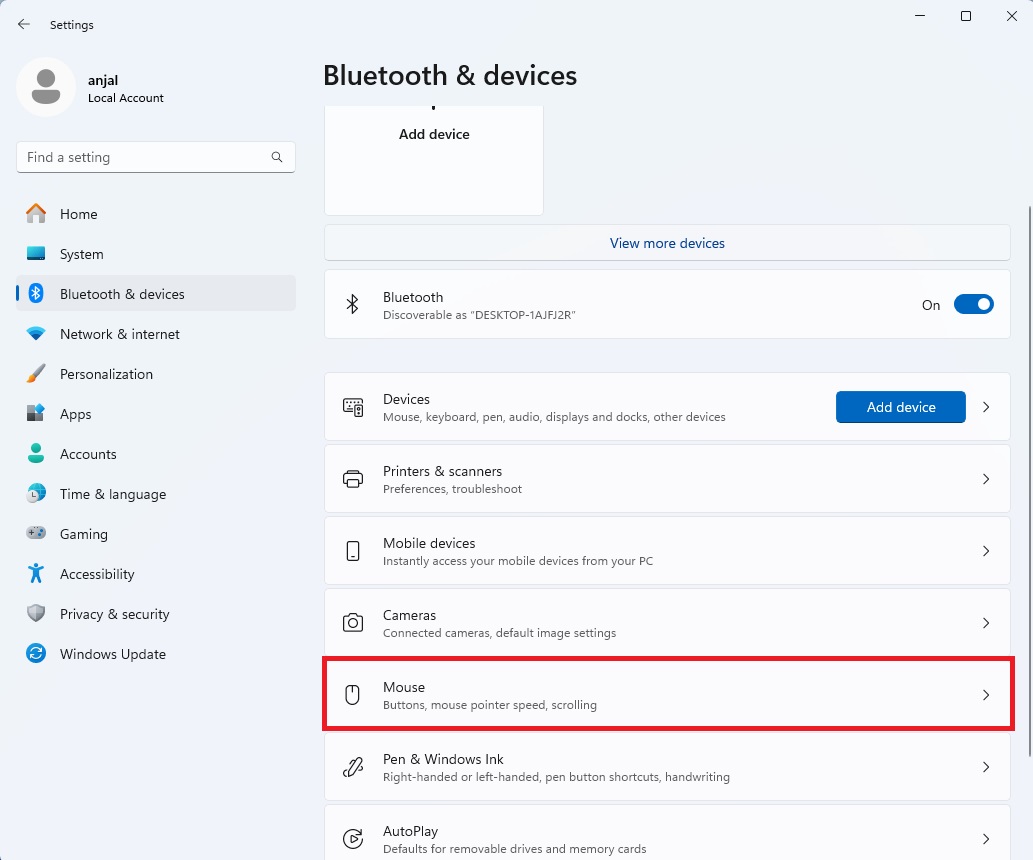
- Go to Mouse Settings. Scroll down and click on “Mouse”.

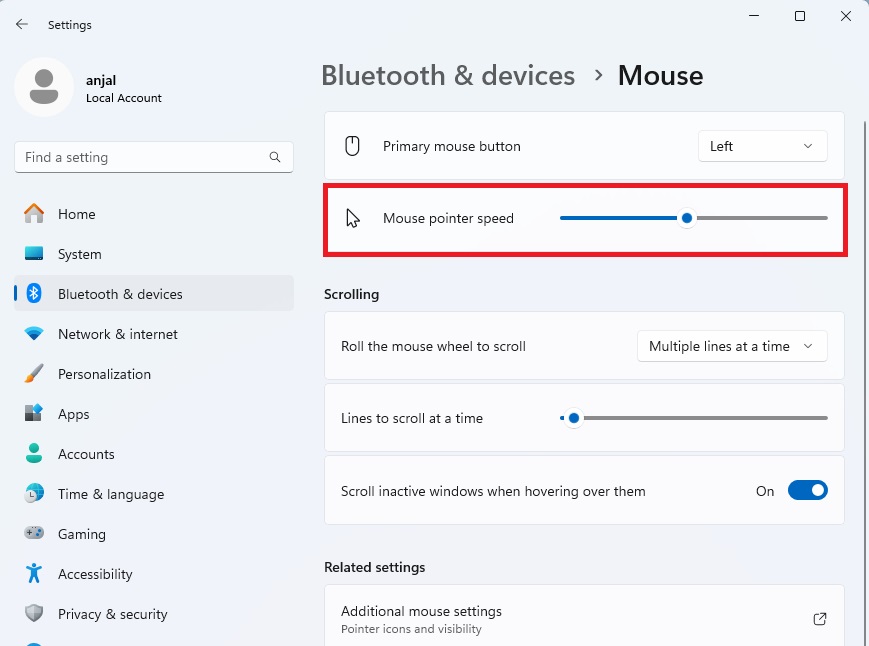
- To adjust Mouse Pointer Speed, go to “Mouse pointer speed.” You’ll find a slider bar right beneath it. This lets you adjust how quickly your mouse moves across the screen. Slide right to increase speed (max 20) or left to decrease (min 1).
 This slider controls the DPI setting of your mouse. If you find the default speed isn’t working for you, play around with the slider until you find something comfortable. Personally, I like to set mine around 10. It feels just right, not too fast and not too slow.
Method 2: Using Manufacturer’s Software
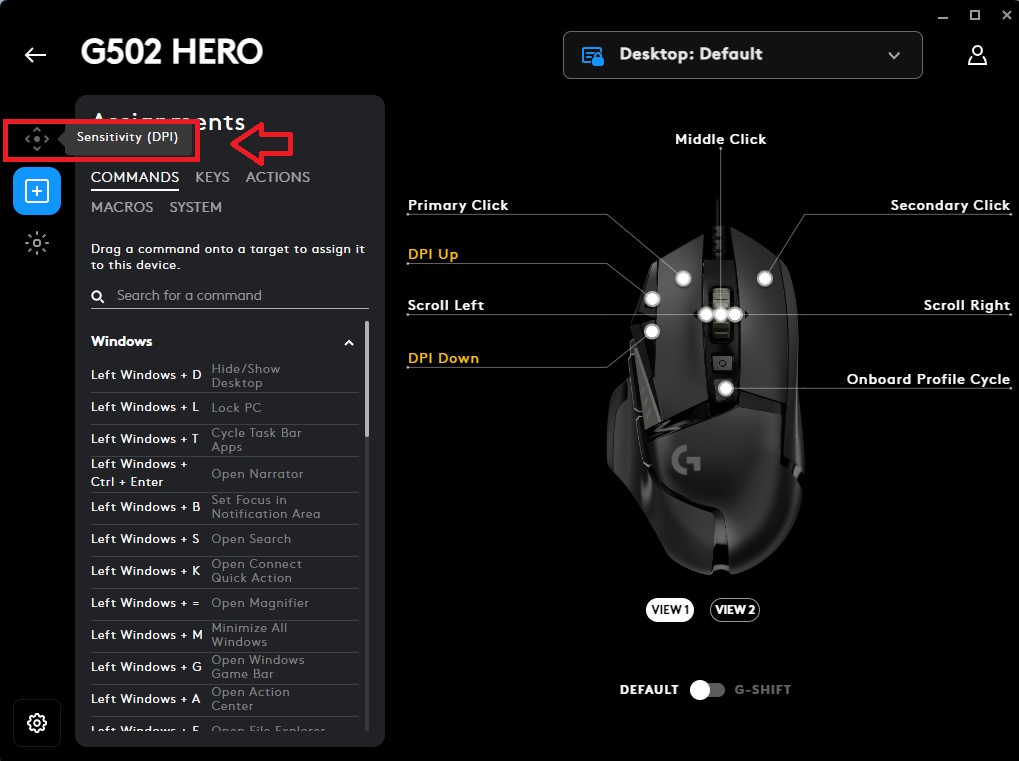
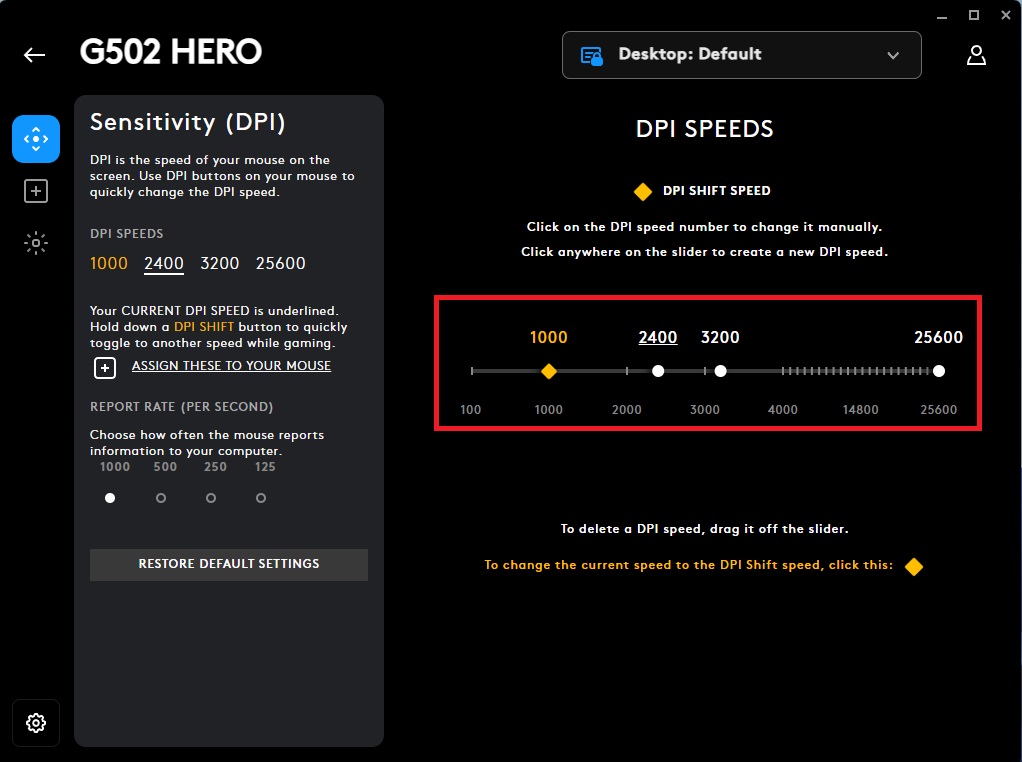
Some gaming mouse manufacturers, like Logitech, offer control software that provides more precise DPI adjustments.
This method is ideal for users who want finer control over their mouse settings or need DPI presets for different scenarios.
- Open Your Mouse Control Software: If you have a gaming mouse, launch the control software provided by the manufacturer (e.g., Logitech G HUB).

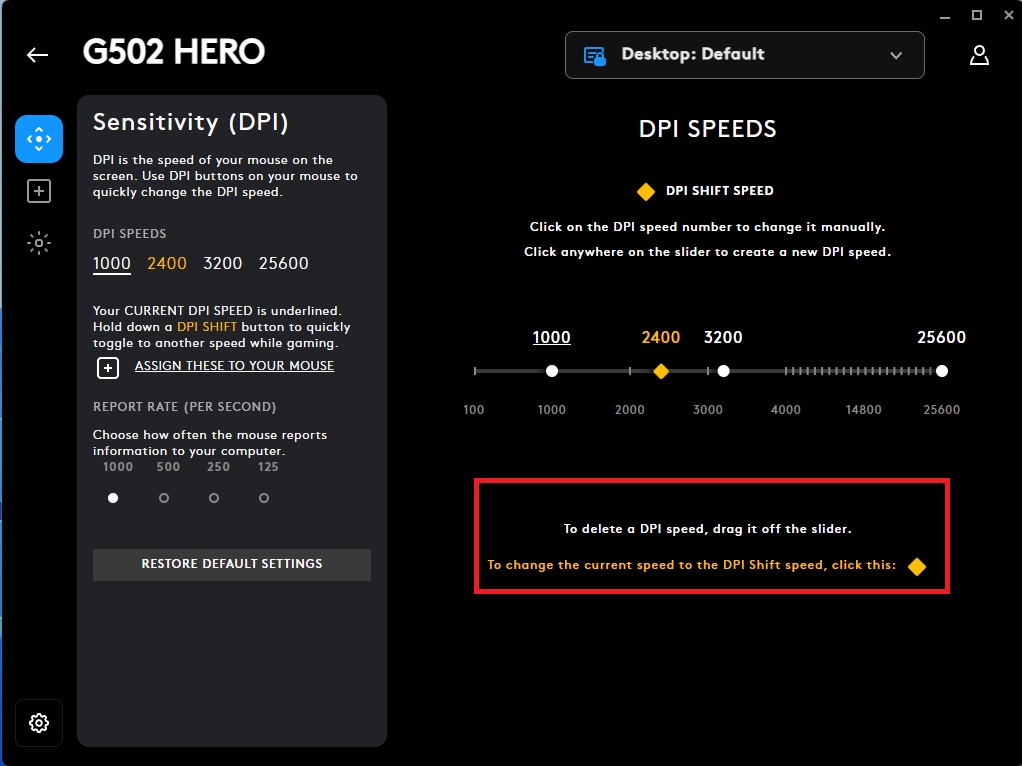
- Adjust DPI Settings: Navigate to the DPI settings menu and adjust the levels to your preference. You can often set multiple DPI stages to quickly switch between different sensitivities.

- Apply Changes: Once you’ve adjusted the settings, apply the changes and exit the software.

Helpful Tip: Its handy to set multiple DPI presets. It can save a lot of time, especially if you switch between tasks like gaming and office work frequently.
Frequent Issues with Your DPI
- Mouse Still Feels Too Fast or Slow
This typically happens when: The default driver settings override your custom DPI settings.
Quick Fix: Make sure to update your mouse driver or check the dedicated mouse software.
2. Slider Not Available
This usually happens when: The “Mouse pointer speed” slider may not appear if your mouse driver is outdated.
Quick Fix: Updating the driver usually fixes this issue.
- Settings Not Applying
This usually occurs because: The mouse control software may override Windows settings.
Quick Fix: Check your third-party software and ensure settings there match what you want.
Verification Steps
To make sure the changes worked:
- Test Cursor Movement: Move your mouse and see if the sensitivity feels comfortable.
- Check DPI Indicator: If your mouse has a DPI button, click it to verify the sensitivity stages.
- Confirm Settings: Reopen the Settings menu to verify the slider is in the correct position.
Final Tips
Here are my top recommendations:
- Start with Moderate DPI: A setting between 800-1600 works well for most tasks.
- Use Presets: If your mouse allows it, set up different presets for gaming and regular use.
- Adjust Gradually: Sudden changes can feel jarring. Adjust in small increments until you find your comfort zone.
If you’re still having trouble, I recommend:
- Rechecking Your Mouse Software: Make sure it’s installed and updated.
- Trying a Different USB Port: Sometimes, a faulty USB connection can impact performance.
- Seeking Additional Help: Visit the mouse manufacturer’s support page for more detailed troubleshooting.
Updates and Maintenance
- Last Tested: November 2024
- Windows Versions Verified: Windows 11 (Latest Update)
 This slider controls the DPI setting of your mouse. If you find the default speed isn’t working for you, play around with the slider until you find something comfortable. Personally, I like to set mine around 10. It feels just right, not too fast and not too slow.